
Optics: a typical 10” Dobsonian.
The SkyWatcher FlexTube 250P or Skywatcher Collapsible 10″ dobsonian is a Newtonian telescope with an aperture of 254mm = 10”, and a focal length of 1200mm, for a focal ratio of f/5. This is fairly standard in the world of Dobsonians–the mirrors among all the common 10” f/5 Dobs are pretty much the same no matter which seller you get it from. Though I can only speak authoritatively about this one sample, you should expect other commercial 10” Dobs to have pretty much the same optics.
A big f/5 mirror is tough to get right. “Fast” telescopes have to be figured more precisely than long-focus ones, and for a big mirror, it is both more crucial and harder to do it. As a result, many fast Newtonian mirrors are undercorrected, resulting in some spherical aberration. These mirrors are parabolic, but they’re not perfect. On mine, there seems to be a bit of a turned-down edge and a pretty hefty amount of spherical aberration, which pushes it just below the standard for acceptability in a typical Newtonian. However, this isn’t as big of a problem as you might think.
The rule of thumb for maximum useful magnification in a telescope with acceptable optics is 2x per mm of aperture, or 50x per inch. Here, that’s 500x. However, atmospheric seeing conditions almost never permit going higher than 400-450x. Usually, the limit for comfortable seeing conditions is around 200x-300x. So a small amount of lost image quality will almost never be noticed compared to the atmospheric turbulence. This is compounded by the fact that larger telescopes suffer from poorer visibility more than smaller ones. For the vast majority of observers, the amount of money that would go into figuring these telescopes to perfection isn’t worth it.
The best way I can sum up the optical problems is this: the images of the Moon at 300-400x that you will see with this telescope surpass what you would see in a 6” and 8” Dobsonian. However, star images are always messy and never focused cleanly down to points the way they should. Despite the images not being especially good, more aperture is more aperture, and it manages to have a clearly higher resolution than better-figured 6” and 8” telescopes.
There are some complicating factors, though. A 10” Dobsonian will take a lot longer to cool than a 6” Dobsonian. The 6” will be showing nice images within 30 minutes, the 10” might need to stay out for an hour or more before the images are steady enough to beat the 6 incher’s. Collimation is more crucial with a big fast mirror than with a slow small one. You’ll learn to collimate pretty quickly when you have to do it every observing session.
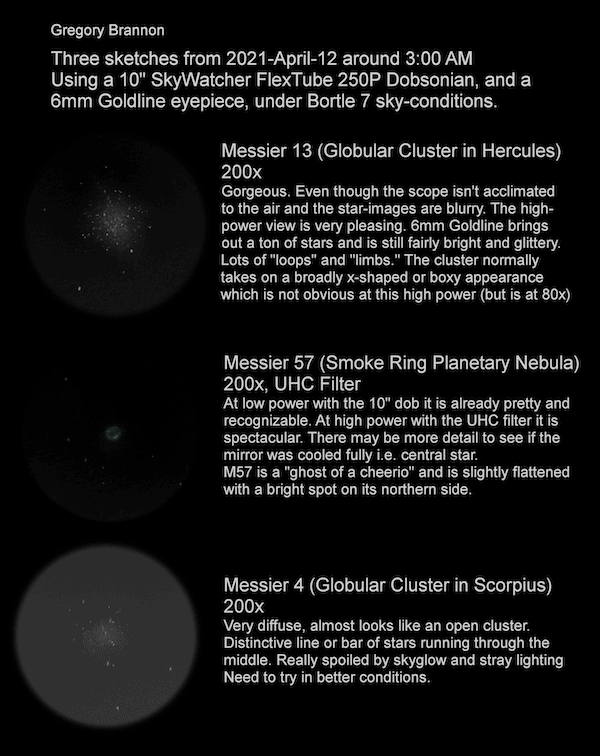
Regardless of how the telescope works at a high resolution, it’s arguably more important to consider its light gathering. 10” captures a lot of energy. 10” is enough to really start chasing galaxies, even under light pollution.
The wings of the Orion Nebula are easily seen, even in bright suburban skies. Globular Clusters are well-resolved at high power with lots of granularity and individual stars. Planetary nebulae show hints of structure that would otherwise be elusive. Many Open Clusters are rich with sparkling stars. The showpiece objects become finely structured, and lots of obscure stuff becomes visible. This thing is an impressive instrument, and there are enough Deep-Sky-Objects up there visible in a 10” Dobsonian to keep you busy indefinitely. You will want a dark sky to get the most out of the telescope, though. If it’s a choice between a smaller telescope you can transport from the city to a dark site or a big Dob that stays home under the lights, consider the smaller portable instrument.
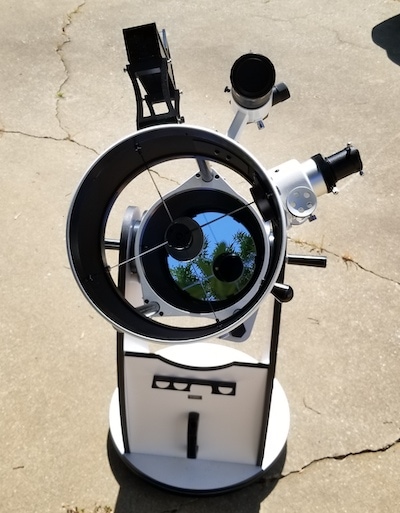
FlexTube 250P Optical Tube Assembly
The FlexTube 250P has a metal single-speed 2” Crayford focuser, which is smooth enough that I don’t ever have a problem focusing. The knobs are large and comfortable to use, and there is virtually zero image shift/miscollimation induced when putting pressure or weight on the extended drawtube. Rest assured that though the focuser is nothing special, it is plenty adequate for its job.
The OTA is made up of three segments. The Mirror tube, which includes the primary mirror, collimatable mirror cell, and altitude bearings; the Upper Tube Assembly, which includes the finderscope mount (a standard Synta-style shoe), the focuser, and the secondary mirror assembly; and the three extendible tubes which connect the two sections.
When extending the tubes, there will be two clicks; one on the way up, and then one when you’ve fully extended them. Don’t stop at the first click; you must extend the telescope all the way out to use it. The click indicates the position where you would use a binoviewer or a DSLR at prime focus; without this ability to slightly shorten the tubes, those items would not come into focus without an additional Barlow lens. By shortening the tube, some light rays will miss the mirror and so the effective aperture will go down by some amount. However, the secondary mirror is oversized to compensate (and to make collimation a little easier).
When setting the telescope up, you should always fully extend the tubes. In fact, squeeze every last millimeter of travel out of those tubes, every single time you use them. It’ll be more likely to hold collimation that way.
You might worry that the flex-tubes influence collimation. If you squeeze all the travel out of the tubes, they don’t seem to affect collimation very much at all. But just moving the telescope from your storage space to the observing site might be enough. I do have to collimate the telescope every time I observe. Once you get used to it, it’s easy. I use a cheap Cheshire collimating eyepiece, but even a collimation cap would work fine. You don’t really need lasers.
Despite the open tube design, the FlexTubes and accompanying structure add an additional 5 lbs compared to the Classic version. Given the 60-pound assembled weight of the thing, I’m not sure you’ll notice it, and it’s still lighter than the GSO/Apertura/Zhumell 10” Dobs.
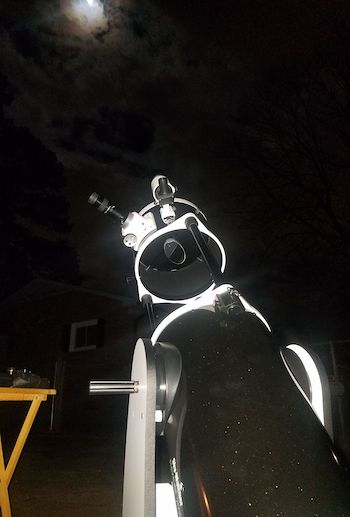
The tube is open when extended, and this can cause stray light problems. Bright lights (street lights, neighbor’s porch lights), the Moon, and even skyglow if it gets really bad, can illuminate the inside of the tube, and this scattered light can get picked up at the eyepiece. There is a (fairly expensive) cover for FlexTube dobs sold by AstroZap, or you can make your own.
We made our own cheap shroud from a black ripstop nylon fabric. It only made an improvement that I could notice when observing objects near the Moon when it’s bright. My shroud was baggy enough that it would occasionally vignette the light path. A rigid shroud made of foam or cardboard has been demonstrated by other users and may be a better choice; it can slide into the tube when retracted.
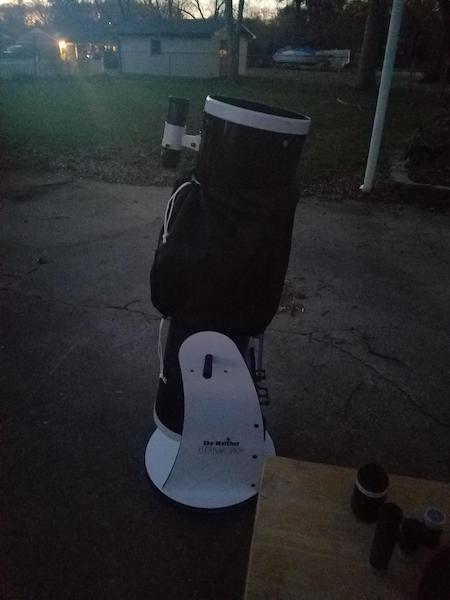
Now there’s a lot of quirks and peculiarities with this kind of optical tube, but the question is, is it worth it? For me, I’m not entirely sure what it is. Whether it is or isn’t depends upon whether or not losing 13 inches of vertical height would solve a problem you have. It can reportedly be put in a car vertically, but I haven’t found a way to get my SUV seats put up with enough room for the dob, so it ends up disassembled, taking up exactly as much space as a solid-tube Dob.
The Tension-Adjustable Rockerbox Mount:
(This section applies to SkyWatcher’s “Classic” 10” dob as well)
A Dobsonian is characterized by a simple, sturdy, easy-to-use rockerbox mount that goes up, down, and all around. They are much more intuitive than equatorial mounts, but more crucially, they’re dirt-cheap. As a result, Dobsonians are barely more expensive than the Optical Tube Assembly. An equatorial mount large enough for a telescope like this would need to be housed in an observatory.
The rockerbox requires some assembly, which took maybe an hour. All the necessary tools are included. When assembling the azimuth bearing, basically leave the bolts as loose as you can–it was too tight when I first put it together.
Amateur telescope makers have been building and tweaking rockerboxes for half a century, and they have gotten pretty good at them. However, it seems a lot of the conclusions they’ve reached seem to have been missed by commercial Dobsonian manufacturers. Dobsonians should have very large semicircular altitude bearings for smooth movement. Both altitude and azimuth bearings should have the right amount of stiction by using teflon gliding on formica. However, commercial Dob manufacturers typically use a cheaper system. The altitude axis is a plastic bearing riding on teflon, and the azimuth axis is teflon sliding on laminate. Traditionally, a spring is used to increase the altitude tension, resulting in smoother motions. This works perfectly well in smaller, lighter Dobsonians, but struggles a bit in larger apertures.
SkyWatcher’s dobs (both the “Classic” and “FlexTube” versions) use a modified system which is claimed to be an improvement. I’m not so sure it is. The main advantage over the traditional system is the adjustable-tension-handles, which let you lock down the telescope to prevent altitude movement when you don’t want it. But the problem is that the telescope is top-heavy, which means you will always have unwanted alt movement when pointed below about 50 degrees or so, you have to keep the tension pretty high. When the tension handle is loose, altitude movement is beautifully smooth, but then you risk it drifting. When the tension handle is tight, it sticks and becomes hard to control at high powers (200x and higher). I don’t understand why this solution was used instead of, say, using larger altitude bearings. It would be less annoying if the scope was a little back-heavy (so accessories would make the balance better instead of worse). At some point, I’m going to get a magnetic counterweight to put on the backside, and I’m sure I’d like the movement better. Even with nice altitude motions, the azimuth motions would still be a little sticky. In theory, you could correct this by putting Formica on the bottom of the bottom board of the rockerbox. I know of some observers giving up on the existing mount and building an entirely new rockerbox.
The best part about the tension adjustment handle system is that the handles make for an especially convenient way of carrying the telescope. There’s no way you’d be able to carry the fully-assembled telescope like this without these handles, you’d have to carry the rockerbox and the OTA separately each time you wanted to take the telescope out, or else put the dob on a moving dolly and roll it out. Orion’s XT-plus (not XT-classic) Dobs are mechanically identical, but the tension handles are replaced with knobs. The tension handles do have a tendency to jab me while I’m observing near the zenith. If this really gets in the way, I take the handle off entirely–high up, you don’t need the tension control.
Accessories
The 250P includes some good eyepieces to start with: standard 25mm and 10mm Plossls, providing 48x and 120x. These are fine on-axis, but the 25mm Plossl is really soft at the edges since it can’t handle the broad light cone of the 250P’s f/5 focal ratio. The 10mm is fine, even near the edge of the fov. These are enough to get you started, but you’ll want to upgrade eventually, both for higher powers and for wider fields of view.
The finderscope is an 8×50 right-angle finderscope. The right angle is very useful because it allows you to be comfortable while using the finderscope as a navigational aid. Straight-thru finders hurt my neck. It is NOT a correct-image finder, as the diagonal uses a mirror. This is pretty annoying in practice, as it makes it difficult to use a star-chart or planetarium app, as asterisms used in star-hopping will be reversed. If using an app, you could try screenshotting a finderscope-scale view and flipping it in your phone’s image editor. A straight-thru-finder (and a Newtonian telescope for that matter) can replicate a star-chart by simply turning the book or phone upside down, and a correct-image finder matches the chart by default.
Aftermarket Accessory Upgrades
One other thing I forgot about from using exclusively straight-thru finders for the better part of a year before I got the 250P was the utility of a straight-thru visual indicator of where the telescope is pointed against the sky. Red dot finders and straight-thru finders let you align the dot or crosshair with the real object in the sky using both your eyes. With the 250P, I was sighting along the tube, and it was pretty imprecise.

I ended up getting a Telrad reflex sight. A Telrad is kind of boxed into being forced into a very specific position–the hardware which facilitates the FlexTubes blocks the bulky Telrad from being placed in a reasonable place to be seen from a sitting position. Even more importantly, it absolutely requires the riser to fit. Since official risers are expensive, mine are 3D-printed. Where I have it now, it requires standing up and leaning over to sight through it. A smaller Rigel Quikfinder might have been a better choice–one ought to fit in a more convenient place.
The Plossl eyepieces are fine to get you started, but eventually, you’re going to want to expand your collection. There are countless possibilities, but beware that cheaper designs won’t always work very well due to the broad light cone of an f/5 system. A nice Barlow can extend the focal ratio to let cheap eyepieces work better and help reach this scope’s especially high powers.
You will need a collimating eyepiece or a collimation cap, or if you want to get fancy, you could get a laser collimator. Since the telescope will not hold its collimation well, you’re going to have to be comfortable with collimation, and you’ll want to have the proper tools.