
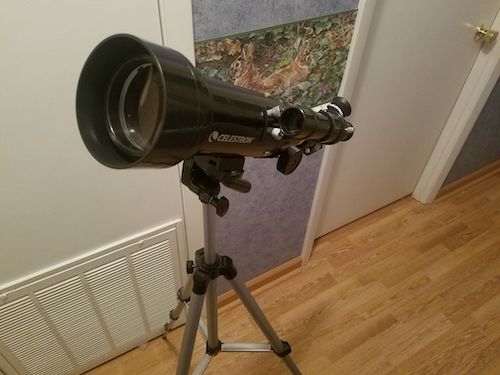
The Tripod of the Celestron TravelScope 70
I have some bad news and some good news.
I normally discuss the optics first, but I’m going to address the tripod first this time, because it is the most important thing to beware of with this telescope. The tripod belongs in the trash. It might work, barely, for a small point-and-shoot toy camera. But a telescope will magnify any small wobble and cause the image to shift and shake tremendously. Even at low magnification, I found that it was almost unusable, but I could just about find focus. At 40x, I couldn’t even find focus–any tap of the focuser knob sent the image into several seconds of shaking. The mount head is soft and plastic, and it feels like it wants to break instead of move where I want it to. It is hopelessly unbalanced in the altitude axis, which means pointing above about 45 degrees is futile. (Of course, for reasons I’ll get into, it’d be futile anyway). It’s also so short that even when fully extended, I had to take a chair out and sit down to reach the eyepiece. It’s too short even for terrestrial use, pointing around the horizon.
That was the bad news. The good news is that the TravelScope 70 is small enough that it can easily be used on any good tripod. So if you already have a nice and sturdy tripod, tall enough for the mount head to get above your face when observing while sitting down (or ideally, when standing as well), then the TravelScope 70 will probably work fine there.
The Optics
The TravelScope 70 has an achromatic lens objective with an aperture of 70mm and a focal length of 400mm. Its lens elements are nicely coated without bright reflections. My impression is that, for the money, this is a pretty great objective lens. It won’t hold up to any 70mm Apochromat, but you get what you pay for.
There are a few problems with the mechanical design of the TS70. First of all, the (non-collimatable) lens cell, which is similar in design to the ShortTube 80’s and some other cheap achromats I’ve seen, was tightened extremely tight. I put in a lot of elbow grease to loosen the lens cell. The trouble is that this tightened lens cell actually bends the glass, creating “pinched optics.” You might not think glass can bend, but you’re only allowed to bend by 1/1000th the width of saran wrap, so screwing the lens cell down so tight makes the image noticeably fuzzier at high powers. In fact, I’d go so far as to say that the image at first was a mess. After loosening the lens cell just enough that I could hear a slight rattle when shaken (but not too much so that the scope would never be collimated), the image was much cleaner and sharper.
When testing the optics, I did so with and without the 45-degree erecting prism, and I found that without the prism, the image is actually pretty good. It’s got some spherical aberration (in the star test it looks pretty bad, but in actual use, it’s not too noticeable, definitely not at 40x given by the stock 10mm eyepiece) and it is a little rough. It remained out of collimation. It is possible (though tedious) to fix collimation in a lens cell like this, but it wasn’t bad enough to worry about.
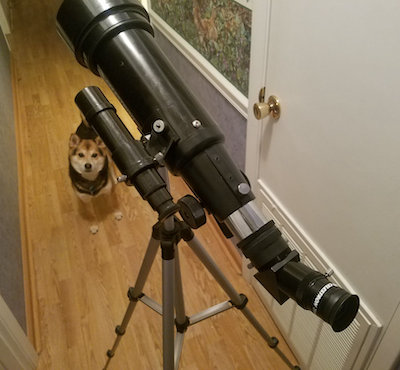
The biggest optical problem in the telescope tube is actually part of the mechanical design of the telescope. The focuser used seems to be identical to the one used on a long-focus 70mm achromat, so it’s too long, and it actually protrudes into the light path. For some positions of the focuser, the entire 70mm objective is visible, for others it’s restricted to perhaps only 60mm! Overall, the aperture is probably around 65mm when used with a mirror star diagonal. It’s 60mm or less when the stock prism diagonal is used, since it takes up more focuser travel and vignettes the light path. It may be possible to saw off part of the focuser drawtube to fix this oversight. I haven’t done this for the review. This is a frankly embarrassing error to make since, as far as I can tell, the quality of the objective is easily good enough to justify making full use of all 70mm of it.
The Accessories
The two eyepieces are a 20mm and a 10mm Modified Achromat (a variant of a Kellner eyepiece that has three elements). They have fairly wide fields of view, sharp centers, and passable edges. They’re nothing special, but they’re far better than what many beginner telescopes come with, and they definitely work for this purpose.
The TravelScope 70 comes with a black nylon bag that can hold the tripod and telescope. It’s a nice extra, and it might have come in handy if the tripod that’s meant to go with it was any good. If you get a nice, but small, tripod, you might make use of it.
The two real letdowns among the accessories are the finderscope and the prism diagonal. The finderscope is ridiculous. Galileo’s telescope was probably better. These things barely belong in a McDonald’s happy meal toy, let alone a telescope. It is barely sufficient for sighting through it to find targets, but it isn’t usable on its own as a wide-field finderscope.
The biggest problem with the accessories, other than the tripod, is the 45-degree erecting prism, which goes between the focuser drawtube and the eyepiece. The body is made of plastic, and it feels cheap. It is both an ergonomic and an optical disaster.
Diagonals typically come in 45-degree angles (with erecting prisms) or 90-degree angles (either with a mirror or an erecting prism). This is because, if you imagine pointing a telescope with no diagonal at all high in the sky, you’d have to crane your neck uncomfortably to get your eye to the eyepiece. A 90 degree diagonal is preferred for astronomy since it allows a comfortable viewing angle even when pointed all the way to the zenith (top of the sky). A 45 degree prism can’t go above 45 degrees before you have to start looking up into it. However, 45 degree prisms can be preferred for nature observing if the tripod is tall enough. And for a terrestrial spotting scope, you do want an upright image. Mirror diagonals will show a mirror image, but don’t degrade the image as much. Because the tripod is so short, a 90 degree erecting prism would have been preferred.
The problems don’t stop with ergonomics. Unfortunately, it also degrades the optics of the telescope. The view of the Moon was plenty sharp with a mirror diagonal installed, but going back to the prism, the view became blurry and there was a lot of chromatic aberration (false color fringing). It’s adequate for viewing at low powers, but it causes very noticeable fringing before you even get to 40x. The prism itself is miscollimated–looking into the prism, the view of the objective lens is off-center, and that means you’re getting even less light.
Upgrading the Accessories
Upgrading the eyepieces is a low priority, as they should serve you for a while.
The finderscope should be replaced with a red dot finder. Red dot finders have no magnification at all, they just project a red dot through a small lens/window onto the sky and use some optical trickery to make it look like it’s “at infinity.” (There’s no parallax). When upgrading, be sure to find one with a compatible mounting foot. The mount is done with two screw-stalks that stick up out of the optical tube, the finder mount slips over them, then two thumb-nuts are screwed onto the stalks. This is the same finder mounting system used by other telescopes like the FirstScope/FunScope, Orion SkyScanner, and more.
Finding objects can be done at low power with the telescope itself—it is its own finderscope.
Upgrading the tripod is the most urgently needed fix, but decent tripods are pretty expensive. Don’t buy the scope unless you already have a decent tripod. If you already have the scope and want an upgraded tripod, don’t spend more than $100 on one. For around $100-150, there are better telescope options altogether.
The prism diagonal is the next most urgently needed replacement. Keep it around for comparison or for when you want to do terrestrial observing, but it’s just no good for serious astronomy.
For astronomy, you want an economical mirror star diagonal. Don’t go too expensive, you just need a cheap $30 or so 1.25” diagonal to get the job done. The views of the Moon, planets, and double stars will be sharper and more color free, and you’ll be able to use longer-focus eyepieces with wider fields of view, and you’ll be able to use more of the telescope’s aperture. And to top it all off, it’ll just be more comfortable to use.
General Use
After my first half hour using the telescope, I was exhausted trying to work around its awful mount. However, in that time, I was able to observe the Double Cluster in Perseus, the Orion Nebula, and the Andromeda Galaxy, and I was pleased enough by them to not immediately write off the telescope as a failure.
After a rest indoors, I set the telescope up again with my good tripod, the mirror diagonal off my Orion ST80, and a red dot finder, and I went out and had a lot of fun with it. It isn’t a powerful telescope, but I personally enjoy small telescope observing quite a lot. The wide-field views you can get with small short telescopes make up for the small aperture, so you can fit a lot of stars in the eyepiece.
The Orion Nebula showed its bright core easily, though somewhat softly, and hinted at the tenuous outer layers of gas and dust. Three stars in the trapezium were easily resolved, and the fourth wasn’t too difficult at 40x. At low power, the entire Orion’s Sword stellar association is visible and very pretty, with the nebula showing up as a fuzzy blob in the middle.
I was not able to see any details in the Andromeda Galaxy M31–the satellite galaxy M32 was only suspected, and there was no hint of the fainter M110. All I could see was a ghostly pale core of the galaxy, and this was the one object that was especially disappointing in comparison with what other small scopes of mine had shown.
Some of my favorite small scope targets are the open clusters M35, M37, M36, and M38, which follow a line up from Castor-Twin’s Foot in Gemini up to the middle of Auriga the Chariot. M37 and M36 can be seen together in the same field of view with a wide field 32mm Plossl eyepiece (though not together with the stock 20mm), as well as M36 and M38. The appearance of these clusters is a fuzzy blob that can be resolved into a glittery mess, with varying degrees of sparkle and fuzziness. Each of these are groups of young stars just spreading out into the Milky Way, and they are observed best in winter and spring.
I was able to see the Clown Face Nebula, though it required a higher magnification of 67x to resolve it as a planet-shaped nebula instead of a star, I only suspected it was a nebula at 40x.
I was even able to observe M81 and M82, a pair of galaxies in Ursa Major.
I went out one night to compare my Orion ShortTube 80 (optically identical to the Celestron TravelScope 80’s objective lens) with the TravelScope 70. By my calculation, the difference between the two shouldn’t have been especially noticeable, but it definitely was. The view of Caldwell 64, the Tau Canis Majoris Cluster, was so much dimmer than the view through the ST80 that it required averted vision to suspect there was more than one star, whereas the ST80 showed it with a sparkly halo easily. The ST80 could just barely do the two bright components in the Leo Triplet, while I couldn’t see them at all in the TravelScope 70. The overall character of the images was the same (to be expected when observing at the same magnification), but the TS70 was dimmer than it should have been, which confirms that the effective aperture was stopped down.
If you go in with the correct expectations (objects will be dim and gray) and look for the right objects (look for objects in guides for small telescopes and binoculars, rather than the famously named nebula you’ve seen in pictures), the telescope can work just fine for deep sky viewing from a suburban or darker sky. In a rural sky, it’d be powerful enough to see every one of the Messier objects. I find that it’s much easier to find and appreciate deep sky objects in a small scope after you’ve gotten familiar with deep sky observing in a larger telescope. But there’s no reason you can’t start small if you set your expectations right.
As I write this, there are no planets worth looking at (Mars is a dot in even the largest telescopes), so the only high-resolution tests I could put the telescope through were of double stars and the Moon.
At high power, the focuser is loose enough to reveal a bit of image shift as you rack the focuser in and out. Without shimming the focuser, this means maintaining good collimation will be difficult. Other than that, the focuser isn’t wobbly or loose, and even at high power, I can find best focus pretty easily.
With the 45-degree prism, the Moon was aesthetically pretty at low powers but a bit of a rainbow mess at 40x and higher. With the mirror diagonal, the moon became much sharper and you could really begin to appreciate its features. I found the 40mm sub-aperture-mask dustcap it comes with wasn’t really needed; it’s plenty sharp enough even at 67x, and there’s no chromatic aberration noticeable until you overpower the scope to about 167x. (Maximum useful power would be around 100-130x) It held its own against a cheap 70mm long-focus achromat and the ShortTube 80.
At one point, while observing, I dropped the telescope about 5 feet onto the floor. There seems to have been no damage. The story might’ve been different on concrete, but I like the scope enough that I don’t want to intentionally drop-test it.